
 Inspecting a Home Heating Oil Tank and Key Considerations
As a standard practice, conducting an annual inspection of your home heating oil tank is advisable. Many oil companies mandate an in-person tank inspection before your initial oil delivery. While this inspection is brief, it’s crucial to be vigilant. Here’s a breakdown for inspecting above-ground heating oil tanks:
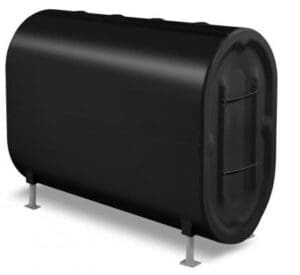
While underground tanks remain hidden, periodic checks are essential for above-ground tanks. Typically, oval-shaped and made of steel, heating oil tanks like the common Granby 275-gallon model are prevalent in the Northeast US. Here are six key aspects to assess during such inspections:
It’s imperative to inspect your home heating oil tank annually to detect leaks and address aging issues promptly, preventing potential indoor oil leaks. Find your specific heating oil tank model for reference here.
Step 1 – Check the Oil Tank’s Foundation
Verifying a sturdy base for your oil tank is crucial. Even in a basement, ground settling over time can pose issues. Inspect all four legs for rust-free, supportive condition. A home heating oil tank holding 250 gallons weighs over 2000 pounds, akin to a small car. Thus, stable footing is paramount.
This inspection gains significance for outdoor tanks. Ideally, the tank should rest on a unified concrete slab. Avoid placing tank legs on separate supports like cinder blocks, which could lead to shifting and potential spills due to bottom fittings bending.
Step 2 – Inspect Oil Tank Seams for Rust
Steel oil tanks are welded along their perimeter and sides. Due to possible imperfections in welding, these seams must be checked for rust. Rusting seams can lead to slow oil leakage. Look closely for any signs of leakage around or on the tank seams.
Step 3 – Inspect for Bottom Leaks
Similar to seams, the bottom of home heating oil tanks is prone to inside-out corrosion. Some oil blends are hygroscopic, absorbing water, which leads to internal tank corrosion and eventual hole formation. Check the tank’s bottom for any signs of leaks. Also, scrutinize the fitting where oil exits the tank; it must be securely sealed and leak-free as it connects to the oil line.
Step 4 – Inspect the Oil Line for Leaks
Surprisingly, oil lines can be prone to leaks. That’s why modern oil lines are typically copper-coated in plastic for added protection. Thoroughly examine the oil line for leaks, tracing it all the way to your oil burner (furnace or boiler) to ensure complete inspection.
Step 5 – Verify Oil Filter for Leaks
The oil filter is a crucial component through which heating oil flows to the fuel oil tank. Typically located near the oil tank, it may also be situated alongside the burner. Since filters are replaced periodically, ensure an annual check to confirm cleanliness and the absence of leaks.
Step 6 – Inspect the Top of the Fuel Oil Tank for Leaks
Although leaks at the top may seem less critical than those at the bottom, they warrant attention. Check for oil drips around the fittings at the tank’s top. The presence of oil suggests potential overfilling, leading to spillage into the basement or soil via the vent pipe. Evidence of overfilling may necessitate a new vent alarm/whistle installation to prevent future issues.
Annual Tank Inspection Reminder
Regularly inspecting your oil tank ensures early detection of issues, preventing potential leaks. If aging or damage is evident, consider replacing the tank. While tanks can last up to 30 years, leaks can cause significant damage. Follow our annual inspection guide for peace of mind and uninterrupted sleep!